Scala on IntelliJ
 Scala Guide
  Scala
Tutorials
Scala
Tutorials  Scala API Reference
Run MXNet Scala Examples Using the IntelliJ IDE (macOS)
This tutorial guides you through setting up a Scala project in the IntelliJ IDE on macOS, and shows how to use the MXNet package from your application.
Prerequisites:
To use this tutorial you need the following software:
- Java 8 JDK
- Maven
- Scala - comes with IntelliJ, so you don't need to install it separately
- OpenCV
- IntelliJ IDE
The following instructions are provided for macOS and Ubuntu 16.04. Windows support is not yet available.
Mac Prerequisites Setup
Step 1. Install brew:
/usr/bin/ruby -e "$(curl -fsSL https://raw.githubusercontent.com/Homebrew/install/master/install)"
Or, if you already have brew, update it:
brew update
Step 2. Install Java 8 JDK:
brew tap caskroom/versions
brew cask install java8
Step 3. Install maven:
brew install maven
Step 4. Install OpenCV:
brew install opencv
Ubuntu Prerequisites Setup
Step 1.: Download the MXNet source.
git clone --recursive https://github.com/apache/incubator-mxnet.git mxnet
cd mxnet
Step 2.: Run the dependency installation scripts.
sudo ./ci/docker/install/ubuntu_core.sh
sudo ./ci/docker/install/ubuntu_scala.sh
Access the Maven Package for MXNet
To view the latest Maven packages, you can check the Maven repository for the org.apache.mxnet packages.
In the tutorial below, you will install the latest package at the time of this writing. You may find a different artifact for your specific operating system, or a newer one by reviewing what is currently available in the Maven repo.
The configuration you should update is in the pom file's dependency for MXNet:
<dependency>
  <groupId>org.apache.mxnet</groupId>
  <artifactId>mxnet-full_2.11-osx-x86_64-cpu</artifactId>
</dependency>
Set Up Your Project
Now that you've installed your prerequisites, you are ready to setup IntelliJ and your first MXNet-Scala project!
Step 1. Install and setup IntelliJ: - When prompted for what to features to enable during IntelliJ's first startup, make sure you select Scala.
- Install the plugin for IntelliJ IDE by following these steps:
On Menu, choose Preferences, choose Plugins, type Scala, and then choose Install. For further plugin help and instructions, refer to Scala plugin setup for IDE.
Step 2. Create a new project:
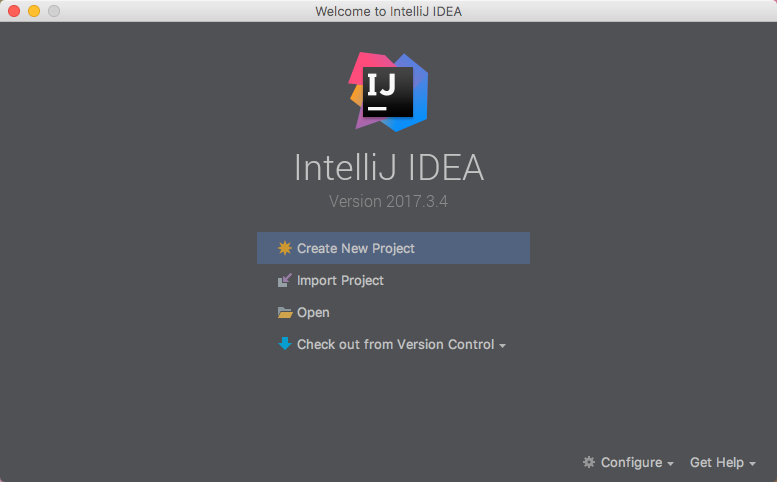
From the IntelliJ welcome screen, select "Create New Project".
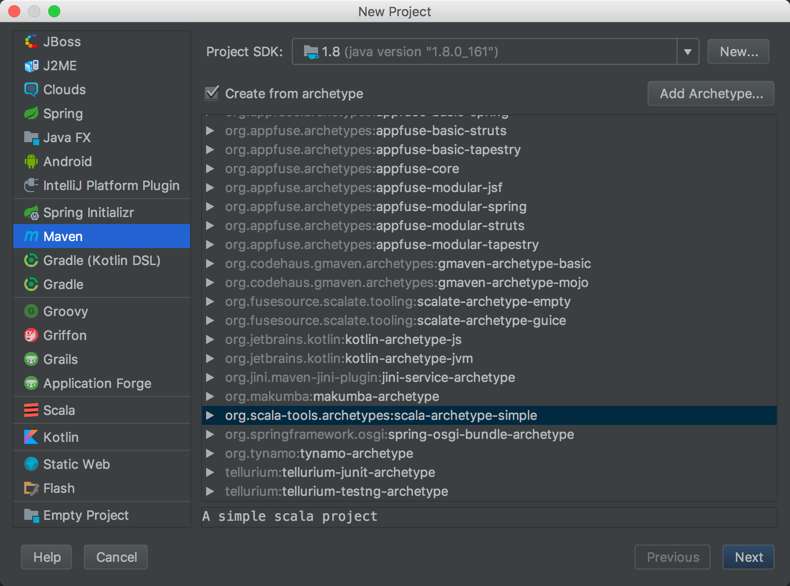
Choose the Maven project type.
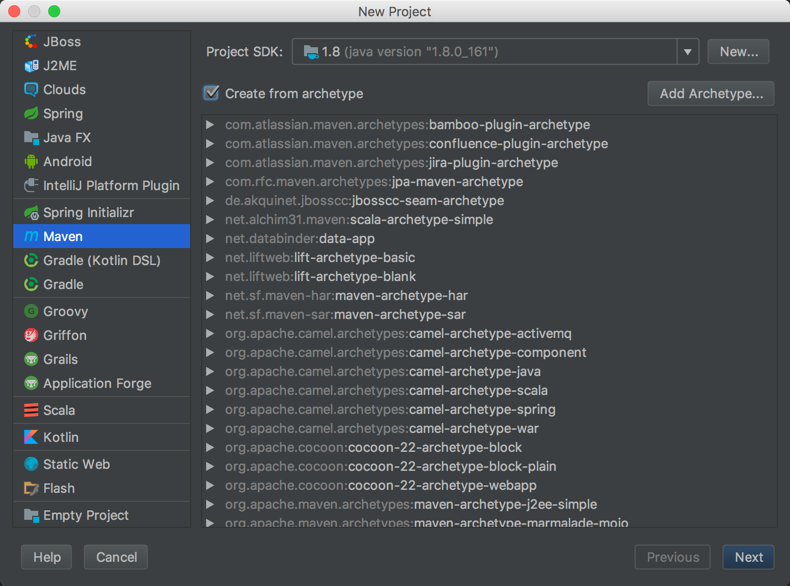
Select the checkbox for Create from archetype.
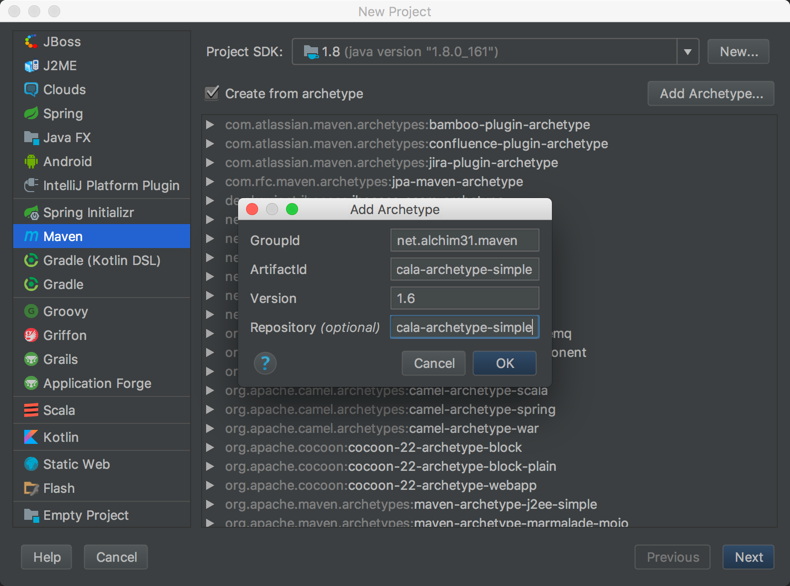
Click the Add Archetype button, and add the following information to each field.
GroupId
net.alchim31.maven
ArtifactId
scala-archetype-simple
Version
1.6
Repository
https://mvnrepository.com/artifact/net.alchim31.maven/scala-archetype-simple
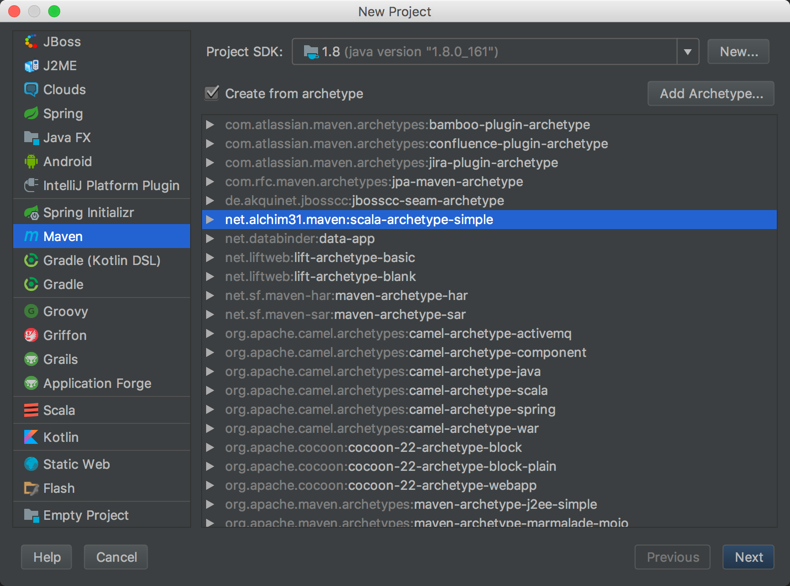
Click Ok to add the archetype, make sure it is selected from the list, and then click Next.
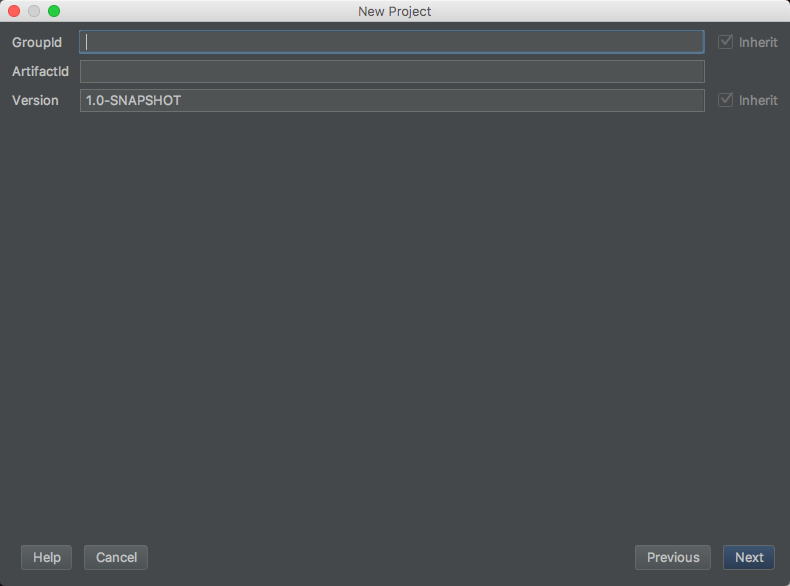
Set the project's metadata. For this tutorial, use the following:
GroupId
mxnet
ArtifactId
scalaMXNet
Version
1.0-SNAPSHOT
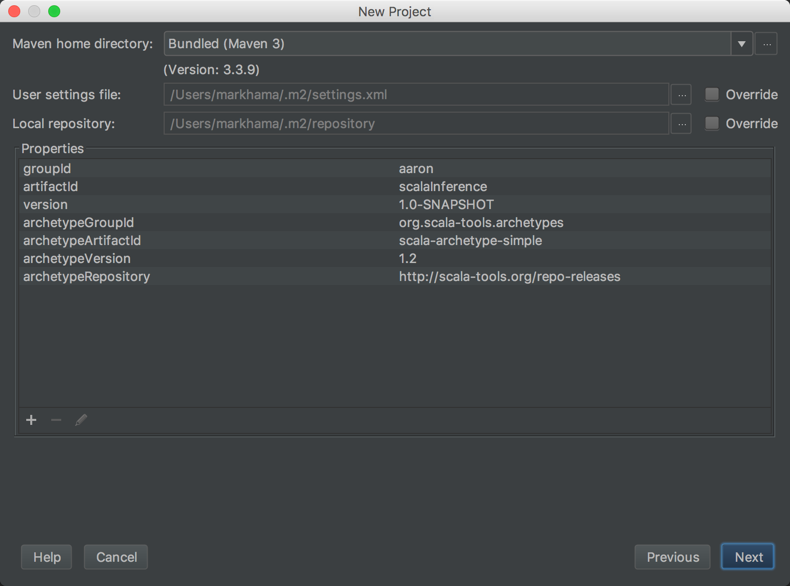
Review the project's properties. The settings can be left as their default.
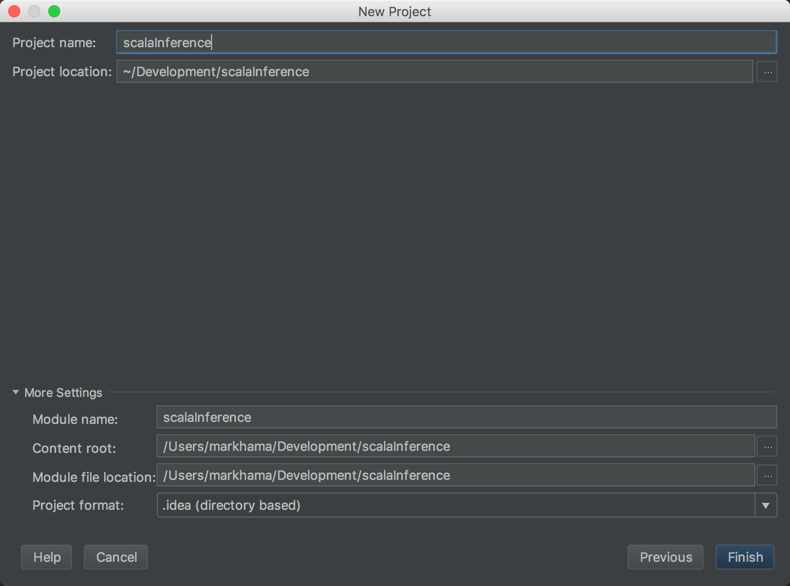
Set the project's location. The rest of the settings can be left as their default.
After clicking Finish, you will be presented with the project's first view.
The project's pom.xml will be open for editing.
Step 3. Replace the pom file's content with the following code. Changes include:
- Project properties: scala.version, upgrading from 2.11.5 to 2.11.8
- Project dependencies: adding the MXNet package from Maven and updating the dependency for JUnitRunner (specs2-junit_) and logging
- Build options: removing '-make:transitive'
<project xmlns="http://maven.apache.org/POM/4.0.0" xmlns:xsi="http://www.w3.org/2001/XMLSchema-instance" xsi:schemaLocation="http://maven.apache.org/POM/4.0.0 http://maven.apache.org/maven-v4_0_0.xsd">
  <modelVersion>4.0.0</modelVersion>
  <groupId>mxnet</groupId>
  <artifactId>scalaMXNet</artifactId>
  <version>1.0-SNAPSHOT</version>
  <name>${project.artifactId}</name>
  <description>My wonderful scala app</description>
  <inceptionYear>2018</inceptionYear>
  <licenses>
    <license>
      <name>Apache2</name>
      <url>https://mxnet.apache.org</url>
      <distribution>repo</distribution>
    </license>
  </licenses>
  <profiles>
    <profile>
      <id>osx-x86_64-cpu</id>
      <properties>
        <platform>osx-x86_64-cpu</platform>
      </properties>
    </profile>
    <profile>
      <id>linux-x86_64-cpu</id>
      <properties>
        <platform>linux-x86_64-cpu</platform>
      </properties>
    </profile>
    <profile>
      <id>linux-x86_64-gpu</id>
      <properties>
        <platform>linux-x86_64-gpu</platform>
      </properties>
    </profile>
  </profiles>
  <properties>
    <maven.compiler.source>1.6</maven.compiler.source>
    <maven.compiler.target>1.6</maven.compiler.target>
    <encoding>UTF-8</encoding>
    <scala.version>2.11.8</scala.version>
    <scala.compat.version>2.11</scala.compat.version>
    <slf4jVersion>1.7.7</slf4jVersion>
    <platform>osx-x86_64-cpu</platform>
  </properties>

  <dependencies>
    <dependency>
      <groupId>org.apache.mxnet</groupId>
      <artifactId>mxnet-full_2.11-osx-x86_64-cpu</artifactId>
      <version>[1.4.0,)</version>
    </dependency>
    <dependency>
      <groupId>org.scala-lang</groupId>
      <artifactId>scala-library</artifactId>
      <version>${scala.version}</version>
    </dependency>
    <dependency>
      <groupId>args4j</groupId>
      <artifactId>args4j</artifactId>
      <version>2.0.29</version>
    </dependency>

    <!-- Test -->
    <dependency>
      <groupId>junit</groupId>
      <artifactId>junit</artifactId>
      <version>4.11</version>
      <scope>test</scope>
    </dependency>
    <dependency>
      <groupId>org.specs2</groupId>
      <artifactId>specs2-junit_${scala.compat.version}</artifactId>
      <version>2.4.16</version>
      <scope>test</scope>
    </dependency>
    <dependency>
      <groupId>org.scalatest</groupId>
      <artifactId>scalatest_${scala.compat.version}</artifactId>
      <version>2.2.4</version>
      <scope>test</scope>
    </dependency>

    <!-- Logging -->
    <dependency>
      <groupId>org.slf4j</groupId>
      <artifactId>slf4j-api</artifactId>
      <version>${slf4jVersion}</version>
    </dependency>
    <dependency>
      <groupId>org.slf4j</groupId>
      <artifactId>slf4j-log4j12</artifactId>
      <version>${slf4jVersion}</version>
    </dependency>
  </dependencies>

  <build>
    <sourceDirectory>src/main/scala</sourceDirectory>
    <testSourceDirectory>src/test/scala</testSourceDirectory>
    <plugins>
      <plugin>
        <!-- see http://davidb.github.com/scala-maven-plugin -->
        <groupId>net.alchim31.maven</groupId>
        <artifactId>scala-maven-plugin</artifactId>
        <version>3.2.0</version>
        <executions>
          <execution>
            <goals>
              <goal>compile</goal>
              <goal>testCompile</goal>
            </goals>
            <configuration>
              <args>
                <!--arg>-make:transitive</arg-->
                <arg>-dependencyfile</arg>
                <arg>${project.build.directory}/.scala_dependencies</arg>
              </args>
            </configuration>
          </execution>
        </executions>
      </plugin>
      <plugin>
        <groupId>org.apache.maven.plugins</groupId>
        <artifactId>maven-surefire-plugin</artifactId>
        <version>2.18.1</version>
        <configuration>
          <useFile>false</useFile>
          <disableXmlReport>true</disableXmlReport>
          <!-- If you have classpath issue like NoDefClassError,... -->
          <!-- useManifestOnlyJar>false</useManifestOnlyJar -->
          <includes>
            <include>**/*Test.*</include>
            <include>**/*Suite.*</include>
          </includes>
        </configuration>
      </plugin>
    </plugins>
  </build>
</project>
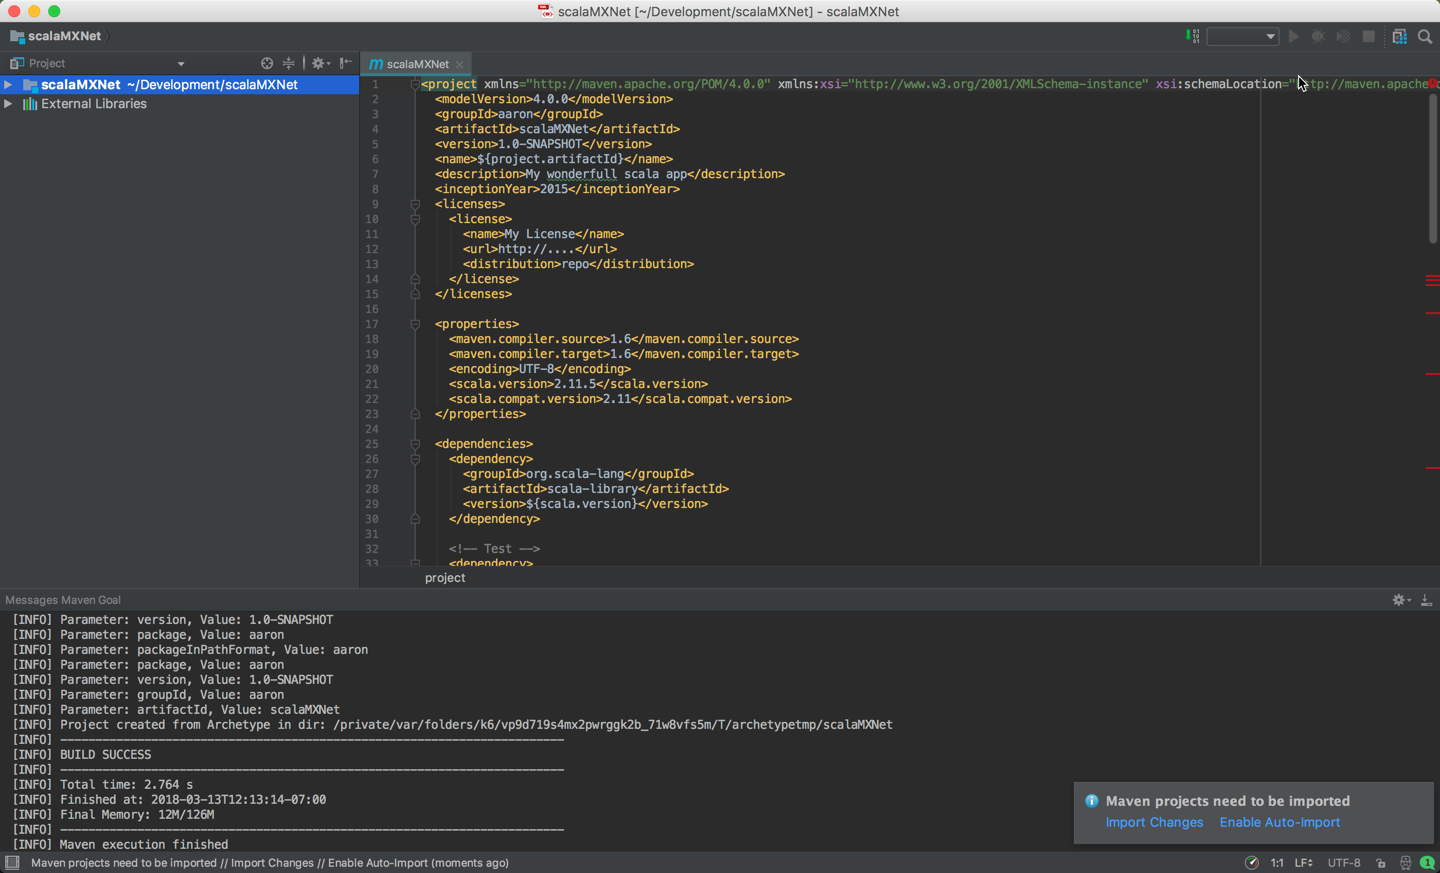
Step 4. Import dependencies with Maven:
- Note the prompt in the lower right corner that states "Maven projects need to be imported". If this is not visible, click on the little greed balloon that appears in the lower right corner.

Click "Import Changes" in this prompt.
Step 5. Setup log4j configuration
Create a folder src/main/resources and a new file in it src/main/resources/log4j.properties with the contents:
log4j.rootLogger = info, stdout

log4j.appender.stdout = org.apache.log4j.ConsoleAppender
log4j.appender.stdout.Target = System.out
log4j.appender.stdout.layout = org.apache.log4j.PatternLayout
log4j.appender.stdout.layout.ConversionPattern=%d{yyyy-MM-dd HH:mm:ss,SSS} [%t] [%c] [%p] - %m%n
Step 6. Build the project:
- To build the project, from the menu choose Build, and then choose Build Project.
* Note that if you run into bad option: '-make:transitive', please remove <arg>-make:transitive</arg> from pom.xml and <parameter value="-make:transitive" /> from .idea/scala_compiler.
Step 7. Run the Hello World App:
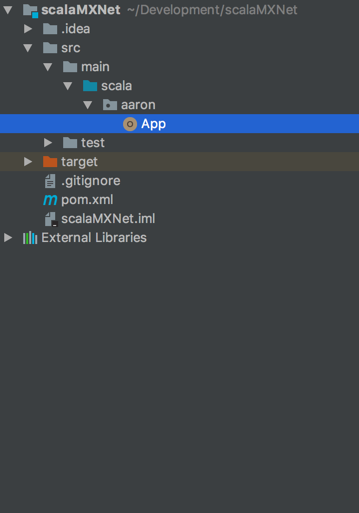
Navigate to the App included with the project.
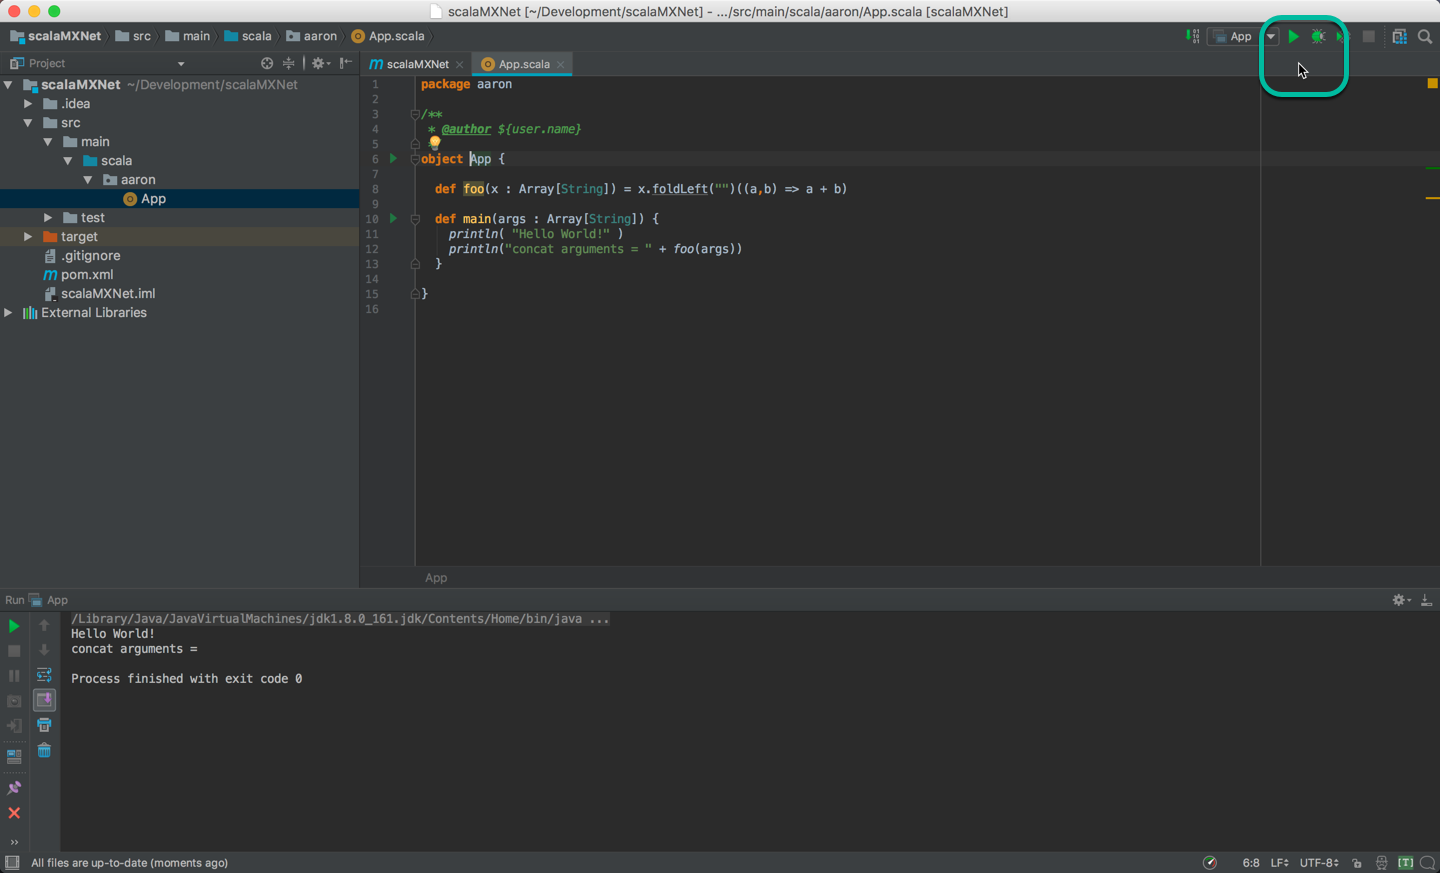
Run the App by clicking the green arrow, and verify the Hello World output
Step 8. Run Sample MXNet Code in the App:

Paste the following code in the App, overwriting the original hello world code. Then click the green arrow to run it.
object App extends App {
  import org.apache.mxnet._

  private val a = NDArray.ones(2, 3)
  println("Testing MXNet by generating an 2x3 NDArray...")
  println("Shape is: ")
  println(a.shape)
}
The result should be this output:
Testing MXNet by generating an 2x3 NDArray...
Shape is:
(2,3)

Process finished with exit code 0
Troubleshooting
If you get an error, check the dependencies at the beginning of this tutorial. For example, you might see the following in the middle of the error messages, where x.x would the version it's looking for.
...
Library not loaded: /usr/local/opt/opencv/lib/libopencv_calib3d.x.x.dylib
...
This can be resolved be installing OpenCV.
Using MXNet from source
If you chose to "Build from Source" when following the install instructions (or the detailed build from source instructions), you can use your custom build instead of the build from maven. Use your build by editing the pom.xml file and replacing the org.apache.mxnet dependency with the following:
      <groupId>org.apache.mxnet</groupId>
      <artifactId>mxnet-core_${scala.version}-${platform}-sources</artifactId>
      <scope>system</scope>
      <systemPath>/PathToMXNetSource/incubator-mxnet/scala-package/assembly/osx-x86_64-cpu/target/mxnet-full_${scala.version}-osx-x86_64-cpu-1.6.0-SNAPSHOT-sources.jar</systemPath>
    </dependency>

    <dependency>
      <groupId>org.apache.mxnet</groupId>
      <artifactId>mxnet-full_${scala.version}-${platform}</artifactId>
      <scope>system</scope>
      <systemPath>/PathToMXNetSource/incubator-mxnet/scala-package/assembly/osx-x86_64-cpu/target/mxnet-full_${scala.version}-osx-x86_64-cpu-1.6.0-SNAPSHOT.jar</systemPath>
    </dependency>
Note that you have to edit both of the systemPath properties to point to your generated jar files.
Command Line Build Option
- You can also compile the project by using the following command at the command line. Change directories to this project's folder then run the following:
mvn clean package -e -P osx-x86_64-cpu
The -P <platform> parameter tells the build which platform to target.
The -e will give you more details if the build fails. If it succeeds, you should see a lot of info and some warning messages, followed by:
[INFO] ------------------------------------------------------------------------
[INFO] BUILD SUCCESS
[INFO] ------------------------------------------------------------------------
[INFO] Total time: 1.186 s
[INFO] Finished at: 2018-03-06T15:17:36-08:00
[INFO] Final Memory: 11M/155M
[INFO] ------------------------------------------------------------------------
The build generates a new jar file in the target folder called scalaInference-1.0-SNAPSHOT.jar.
Next Steps
For more information about MXNet Scala resources, see the following: